
Welcome to the University of Mount Olive! Beginning college is an exciting time where you will be experiencing many new things in a short amount of time. We understand that technology can be overwhelming, so we have prepared this document to assist you in navigating our system.
Contacting IT for assistance
The IT department is located in the Communications building beside the computer lab. The hours of operation are:
Support: Monday – Friday 8 AM to 5 PM
Moodle: Monday - Thursday 1 PM to 10 PM
Friday 11 AM - 8 PM
Closed Weekends and Holidays
If you have an IT issue you need help with, please create a support ticket. The link is on the MYUMO page (https://my.umo.edu) under Everyday Tools labeled Support Ticket. (For a detailed explanation on how to create a support ticket, please refer to the section titled Creating a Support Ticket further down on this document)
You may also email support@umo.edu. Please be sure to include your UMO username and a contact phone number or a personal email address so we can contact you. You may call 919-658-7679 or extension 1347 from any on campus phone. If no one answers please leave a message to include a call back number. This will also generate a support ticket.
IT Services
The IT department offers free services for all students. We’re here to help with issues such as:
- Software installation
- Virus/Malware removal
- Hardware changes
- Technology-related advice
- Free Software (Microsoft Office and AVG antivirus)
Student Username and Password
Your username should have been provided to you. If not, your username is comprised of your initials followed by the last four digits of your student ID. For example:
John H. Doe with Student ID P000123456 would have a username of JHD3456.
All new student accounts have a default password that begins with UMO_ and ends with the last six digits of their student ID. For example:John H. Doe with Student ID P000123456 would have a password of UMO_123456.
We strongly recommend all students change their passwords once they have successfully logged into MyUMO for the first time. To change your password, simply click on Password Self-Service from MyUMO. (For a detailed explanation on how to change your password, please refer to the section titled Password Self-Service further down on this document)
MyUMO
MyUMO (https://my.umo.edu) is the main hub for many of the services at the University Of Mount Olive. From this webpage you’ll be able to access almost everything you need on a day to day basis. The IT department strongly suggests all new students become familiar with MyUMO by exploring some of the many useful links such as:
- Moodle
- MyFinancialAid
- Support Tickets
- Self-Service
- Password Self-Service
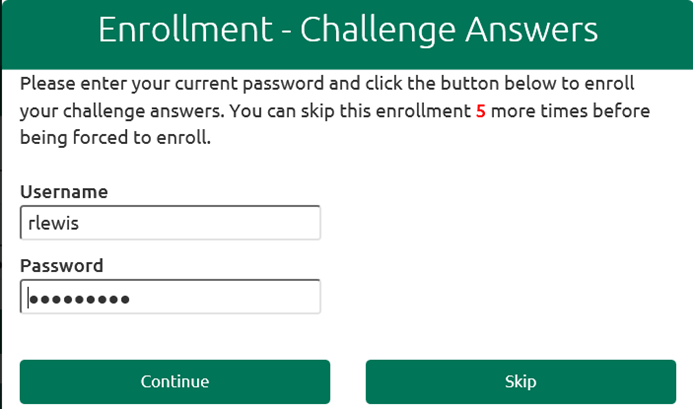
The first time you log in, you’ll be prompted to fill in your Enrollment – Challenge Answers. You do not have to complete this step right now, but we strongly suggest you take the time to do so, as it will be very beneficial if your password should expire or be forgotten. If you do not wish to complete your challenge answers now press the Skip button. This will take you back to MyUMO. However, you may only skip challenge answers 5 times before you are forced to do it. So let’s take a minute and fill these out.
 You will be given a choice of 10 questions, of which you only need to answer 3.
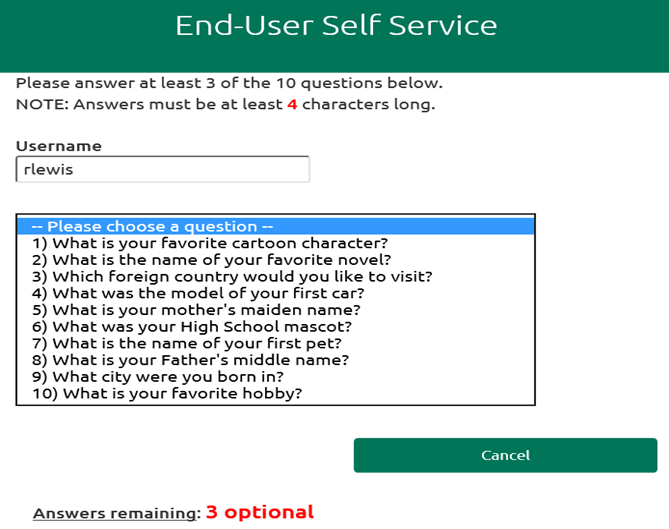
Once you have answered enough questions press Continue.
You will next be prompted to input information regarding your mobile phone. If you forget your password you can request a temporary one-time password to log in. This one-time password can be sent via either text message or email. Your mobile phone information is only necessary for password retrieval if you want to receive a temporary password via text message. If you do not have a cell phone or would not like to receive a temporary password via text message you can click on the check box at the bottom that says Permanently Suppress Reminders and you won’t be asked for this information again.
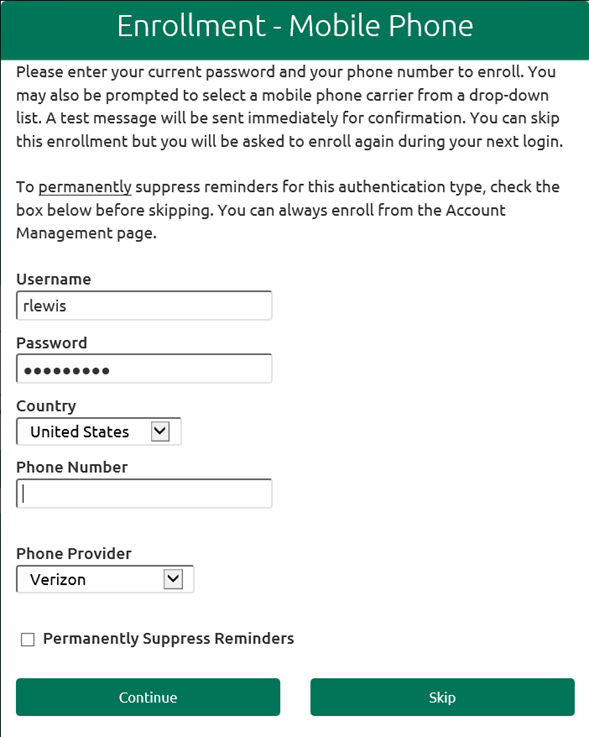
If you would like to receive one-time passwords via text message simply fill out the Country, Phone Number, and Phone Provider fields and press Continue. If your carrier or country is not listed, this service cannot be utilized by your cell phone.
Next, you’ll be prompted to input an email address. Again, this email address is only necessary if you would like to receive one-time passwords sent to it. Please ensure you use a NON-UMO email address for this field. This should be a personal email account only you can access.
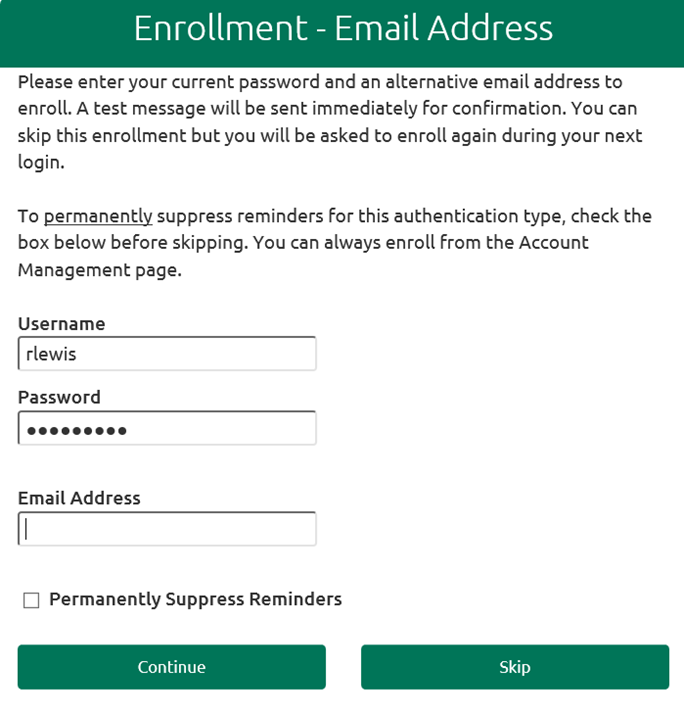
If you do not have a personal email address or would not like to receive a temporary password via email you can click on the check box at the bottom that says Permanently Suppress Reminders and you won’t be asked for this information again.
Password Self-Service
Password Self-Service is where you can manage your UMO password. From here you’ll be able to change your password, change your security challenge questions, or unlock your account if your password expires.
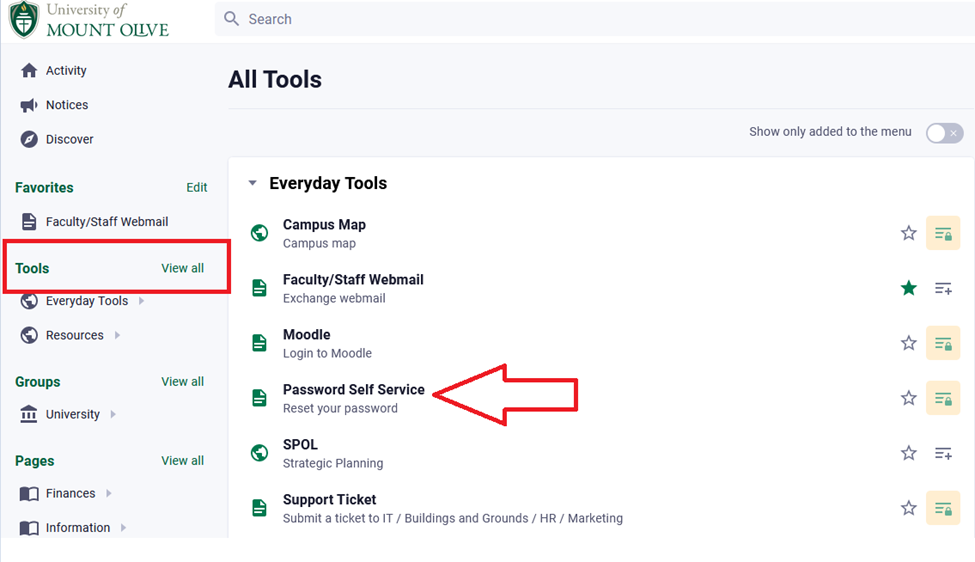
Once you log into MyUMO, click on Tools > Password Self-Service and you will be taken to an Account Management page where you can change your password and set up your security challenge questions.
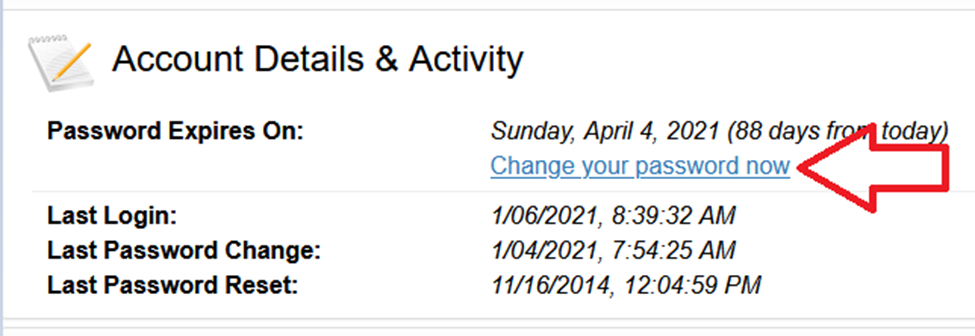
To change your password, simply press Change Now.
You’ll be prompted to input your password again for security purposes.
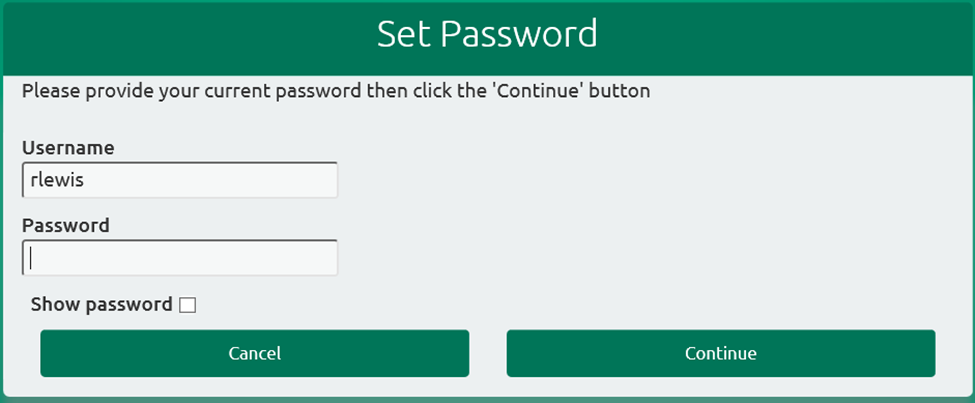
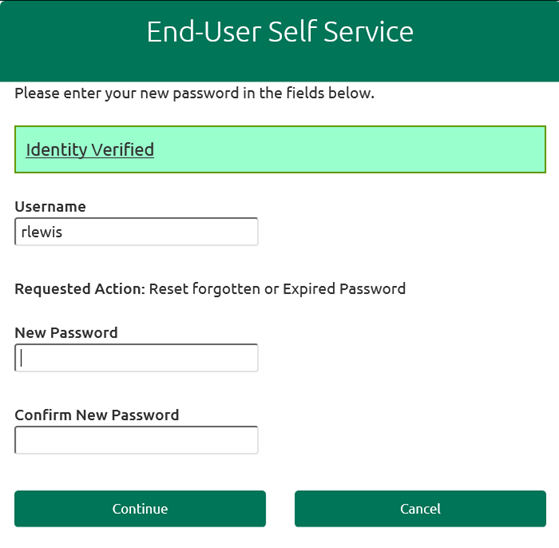
Press Continue to proceed. You’ll now be prompted to input your new password and confirm it as well.
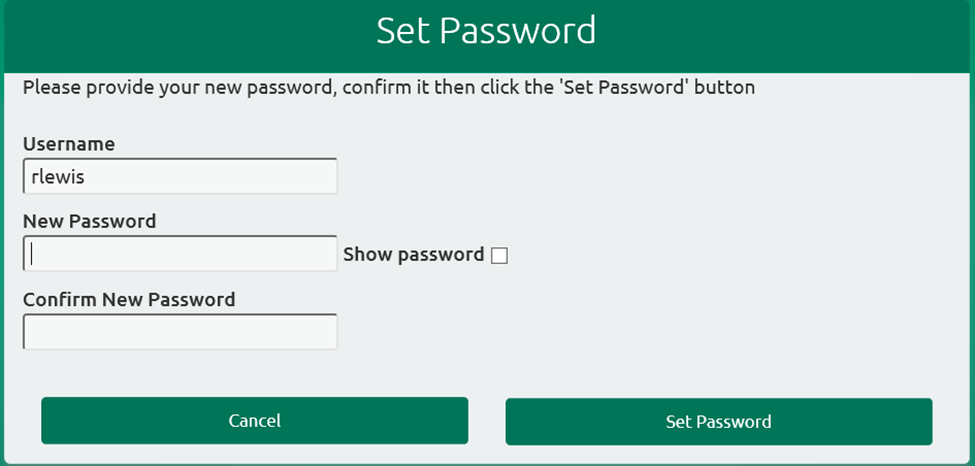
Passwords must be at least 8 characters long and include at least one of each of the following:
- Uppercase letter
- Lowercase letter
- Number
- One special character (!, @, #, $, %, etc.)
In addition, when changing your password, you may not repeat any of your previous five passwords.
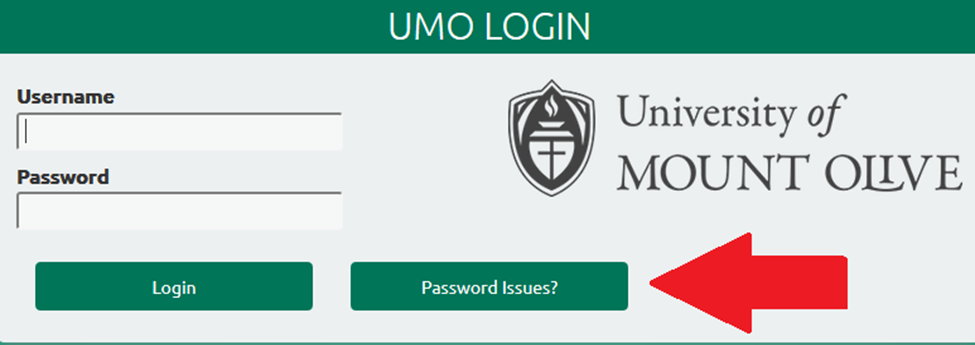
Passwords expire every 90 days. In the event that your password expires and you are locked out of your account you can unlock your account at any login screen.
Go to My.umo.edu UMO LOGIN page. Click on Password Issues.
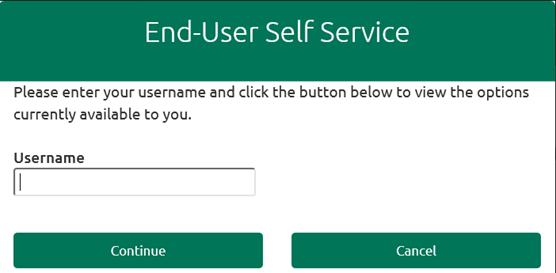
You’ll be prompted to enter your username then press Continue.
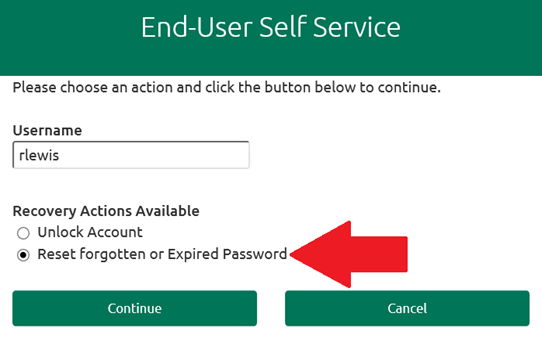
Now you’ll choose Reset Forgotten Password and click Continue.
Choose your Authentication Type as 2 Challenge Answers.
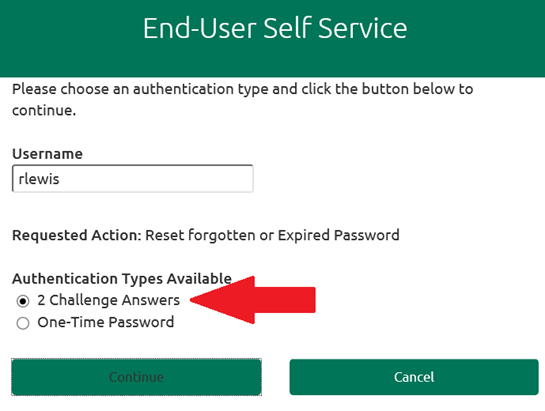
You’ll then be able to answer the security challenge questions that you set up when you first logged into MyUMO. Ensure that you are typing in the answers exactly the same as when you originally answered them, as the system is case-sensitive.
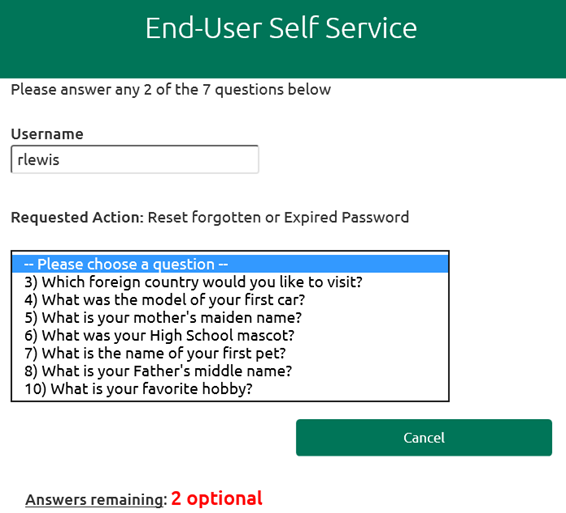
Once you have answered the 2 questions press Continue. You will now be able to create a new password.
Creating a Support Ticket
To create a support ticket, click on Tools > Support Ticket on MyUMO.
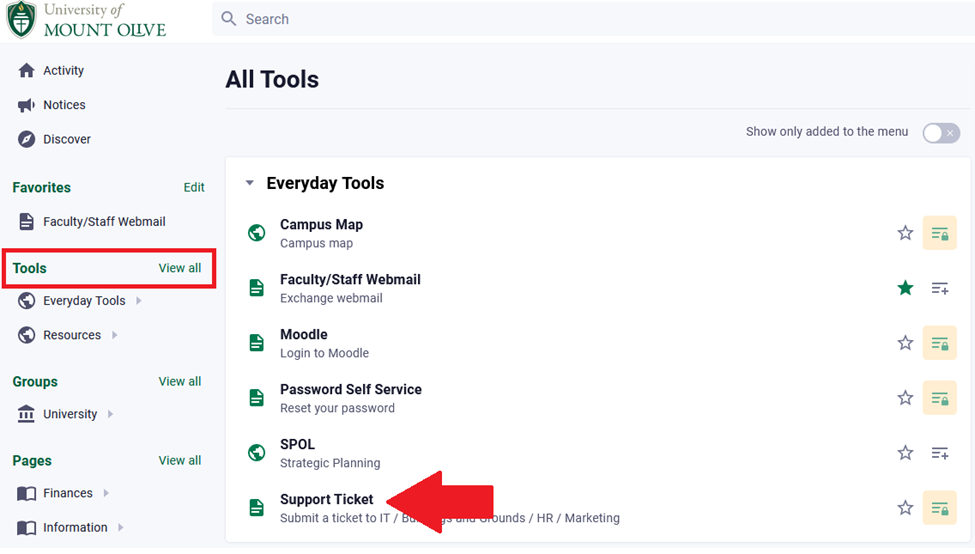
Once you login you’ll be able to view past support tickets you’ve created by clicking on View Tickets or create a new support ticket by clicking on the drop box under Submit a Ticket.
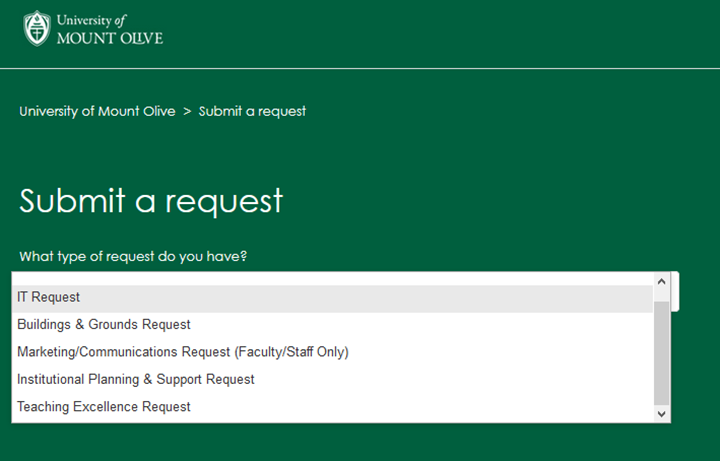
When creating a new support ticket you’ll need to provide some information so we can best serve your needs. First, we’ll need to get you to one of three departments: Tech Support, Buildings and Grounds, or PR and Marketing.
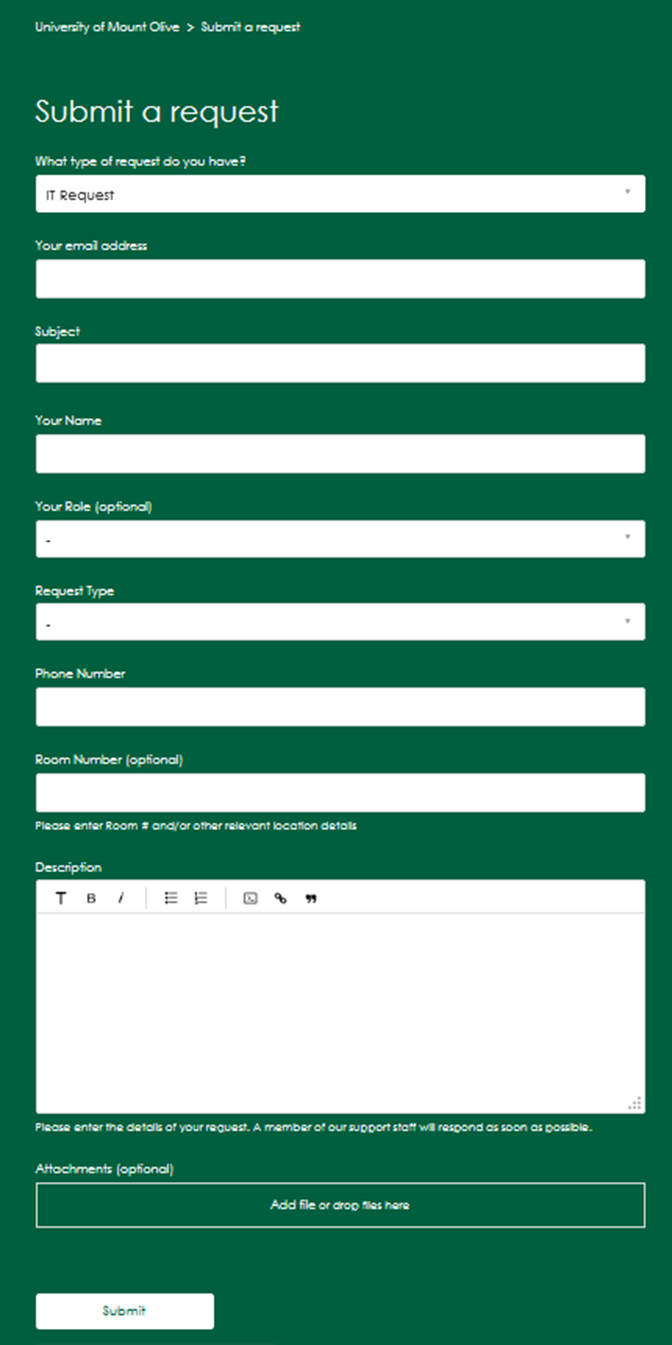 |
Next, we’ll need some information to categorize your issue. Please take the time to fill in as much of the information as possible so your ticket can be processed by the correct team. When you get to Subject make this a broad statement like “My laptop won’t turn on” or “Cannot connect to wireless”. Next we’ll have to give a more in-depth description of the problem. Give us examples of the problems and when you first experienced them. Be sure to give us contact information if you prefer to be contacted that way (otherwise you’ll receive email updates on your issue). If you have any screen shots or files you’d like to attach you can add them by clicking on Attach file. Browse to where your attachment is and select the file. Once you have added all your attachments press Submit. |
You’ll see a summary of your support ticket created. It will show the Ticket Number, last edit date, and status.
You will not have to come back to this page to keep up with your support ticket, as you will be emailed updates on the status of the ticket as we work on it. Any follow up information can be sent by responding directly to the emails you receive.
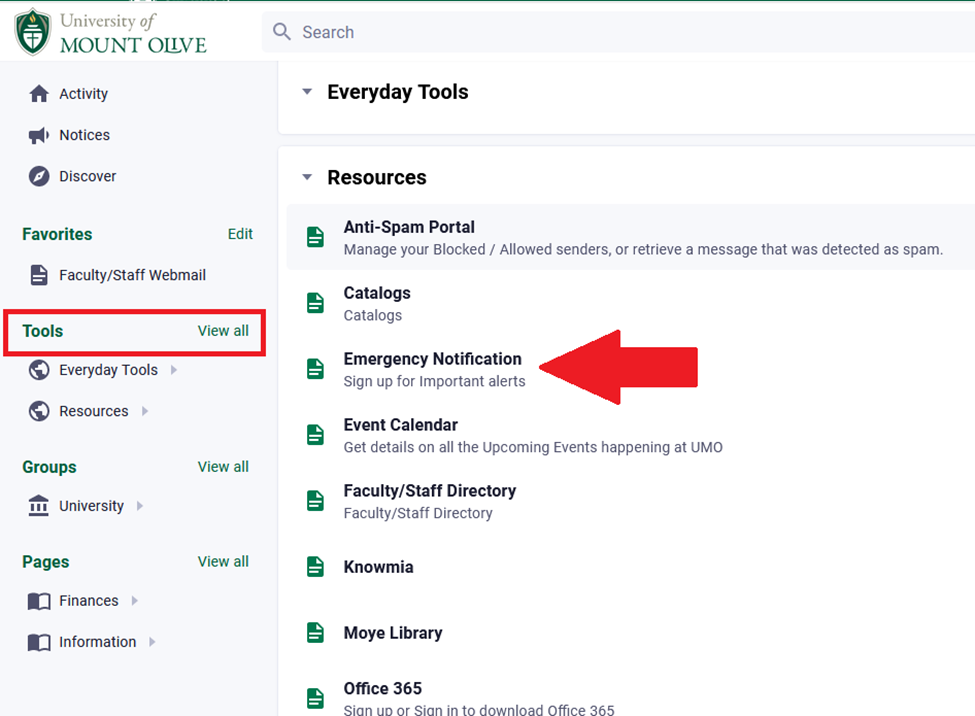
Emergency Notifications
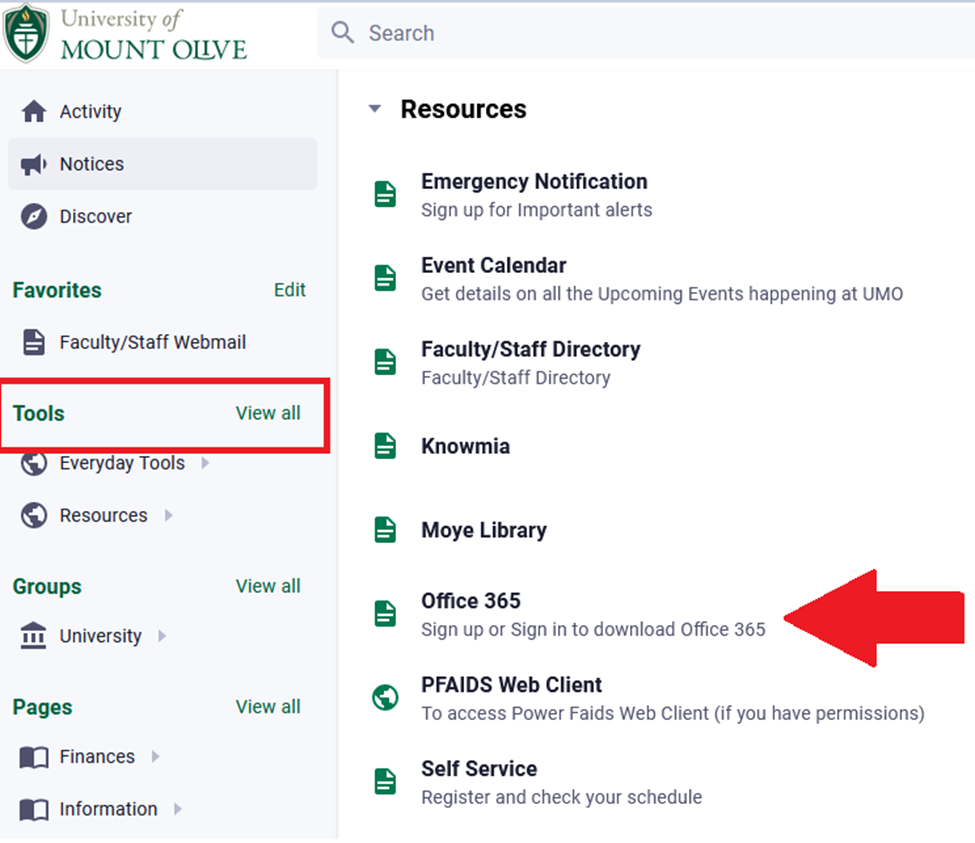
To sign up for text notifications for emergencies, go to MYUMO and you will see the link Emergency Notification.
This will take you to a new website, omnilert.net.
Click on Sign Up.
| You’ll have to fill out all of the fields on the next screen then choose which group you are a part of. By choosing your group, you’ll only receive notifications that are pertinent to you. | 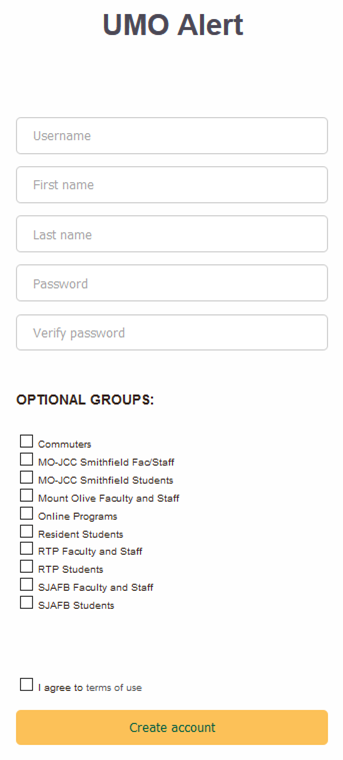 |
Then enter your phone number and select your carrier.
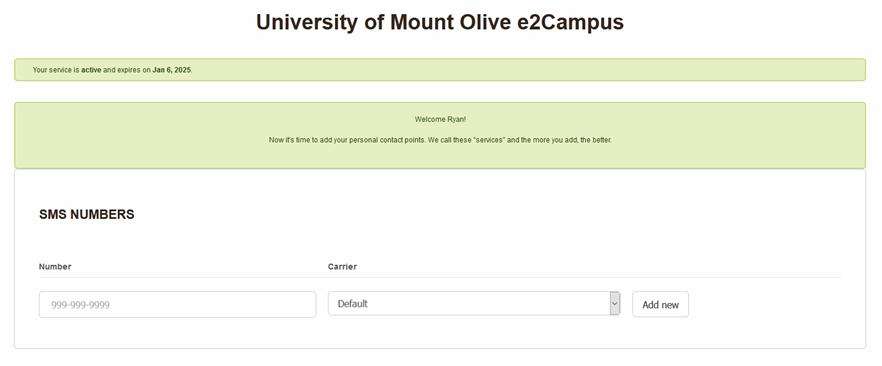
After adding a phone number you’ll be asked to verify it.

You should receive a text message with a verification code. Once you validate your number it’ll show up under your SMS Numbers.
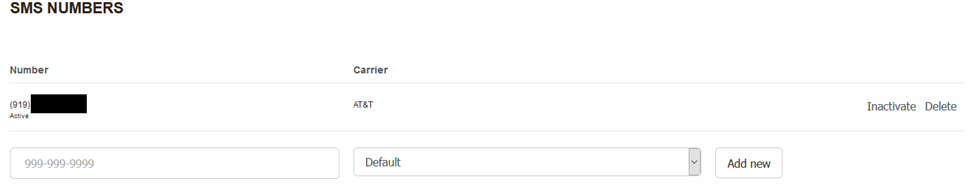
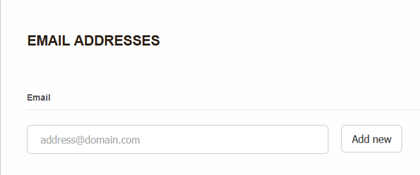
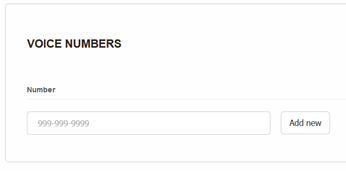
You can repeat this process with an Email Address and a Voice Number if you’d like to be notified in those ways.
 |
 |
*Please note that e2Campus is not maintained by UMO and we have no control over their login systems. If you forget your password for this service please contact their support department at https://support.omnilert.com/hc/en-us.
Wireless
All students should use the UMO-Wireless network. When first connecting, you will be redirected to a login page where you’ll need to provide your UMO username and password.
If you need to connect a Smart TV or video game console to the wireless network you will need to create a Support Ticket with a subject line of “Need to connect my console to wireless”. In the support ticket description you will need to provide the device’s MAC address. A quick Google search will show you how to go about finding your MAC address.
Once you have received a response back from the IT department saying your video game console is approved you will connect to the wireless “Console” network. This has to be done for each video game console you want to connect to the wireless network.
Please DO NOT use any personal routers or wireless access points on campus. When these are detected the port they are connected to will be blocked from all internet access.
Free Microsoft Office 365
The University of Mount Olive offers all students a free copy of Microsoft Office 365. To receive your copy go to MyUMO and click on Tools > Office 365.
| From the Microsoft website enter your email address and click Get Started. | 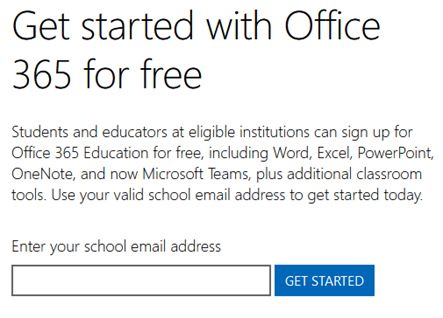 |
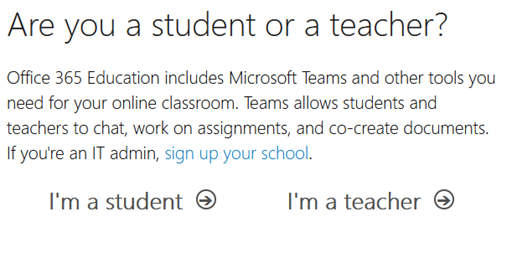
You’ll be prompted to choose between I’m a student and I’m a teacher. Choose student.
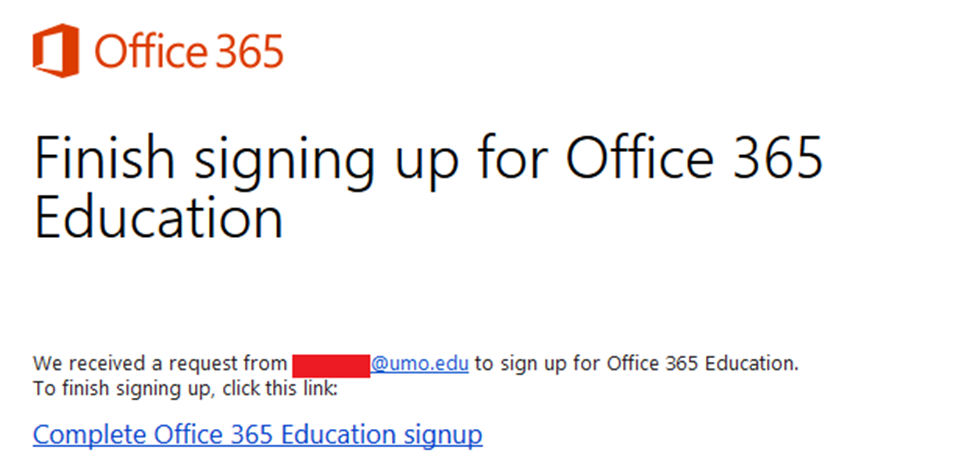
Then check your student email for a confirmation email from Microsoft
Click on the link Complete Office 365 Education Signup within the email to continue.
Complete the last form with your information and press Start at the bottom to continue
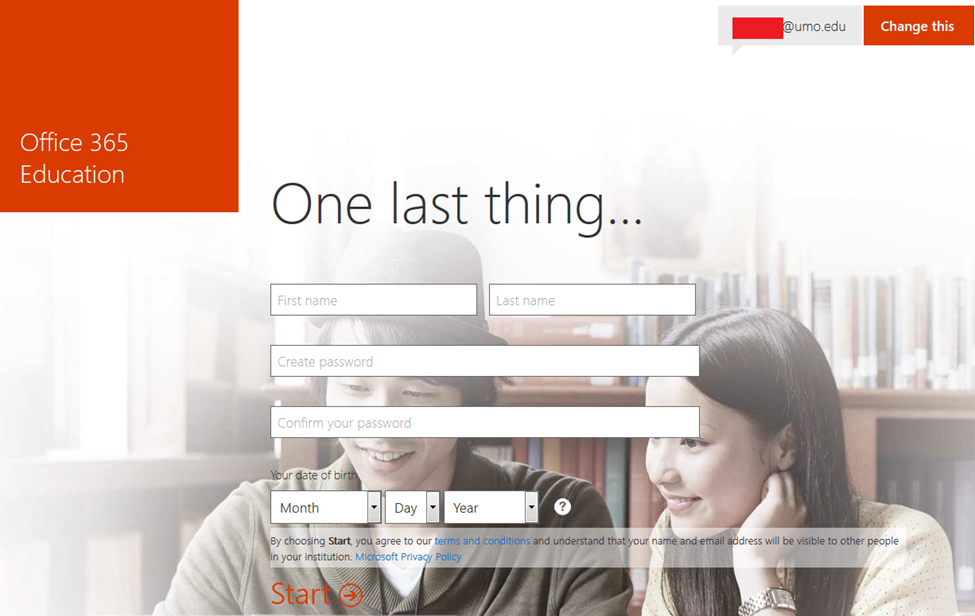
Make sure you UNCHECK the two boxes in the bottom-right corner then click on Install now.

Email on your Phone
Android:
To configure the 'Email' app on an Android device for access to Gmail, just follow the steps below:
- Enable IMAP in your Gmail settings.
- Open the Email application.
- Tap and the Settings
- In the top corner, tap select Next to get started with setup.
- Enter your full Gmail address (username@umo.edu) and password, then select Next.
- On the next screen, you can give the account a nickname and choose the name to display on your outgoing messages. Tap Done.
And you're done. You can verify your settings from the Inbox view by tapping, select Account and then scroll to Server settings.
Incoming settings
IMAP server: imap.gmail.com
Port: 993
Security type: SSL (always)
Outgoing settings
SMTP server: smtp.gmail.com
Port: 465
Security type: SSL (always)
IPhone:
To configure the 'Mail' app on an Apple device for access to Gmail, just follow these steps:
- Make sure you've enabled IMAP in your main Gmail settings
- Open the Settings app on your device
- Tap Mail, Contacts, Calendars
- Tap Add Account...
- Tap Gmail
- Enter your account information, being sure to use your full Gmail address (username@umo.edu)
- Tap Next
- Tap Save
Comments
0 comments
Please sign in to leave a comment.